Showing posts with label tutorials. Show all posts

Fabric Carnation Tutorial

>> Friday, June 18, 2010


Have fun with this super easy pom pom style flower tutotrial!


 Then you can wear them in your girly world with your girlly dog...who also has one on her collar :)

Read more...

Shabby Chic Ruffle Necklace

>> Monday, June 14, 2010


I made this cute summer tutorial for Kristin over at Craft Leftovers...
my version of a super popular look, enjoy!

Supplies –


Strip of fabric 30 inches by 3 inches

Six 2 inch squares of contrasting scrap fabric

17 inch chain with closure

Needle and thread

Safety pin

Scissors


Read more...

Rose Ring Pin Cushion Tutorial

>> Sunday, June 13, 2010


You'll need -
scrap felt (wool is my favorite but craft felt works too)
hot glue gun
bit of ribbon
metal ring base


This little ring is super handy and makes a fun gift for any of your sewing friends! 

Read more...

Gem Cubes

>> Wednesday, June 2, 2010


So what do you get when you combine a little polymer clay, a few flatback crystals, pearl x powder and a rainy afternoon?  You guessed it...Gem Cubes!  I love to mix classic beauty and modern design, these little modern cubes of clay frame the classic rhinestone just right.  And they couldn't be simpler to make too.  Just form little balls of clay then pinch them into chubby cubes with your fingers.  Once you have the shape and size you like pick your crystal and smoosh (that is the technical term) it in the center.  Using your finger rub a little shimmer pearl powder all over the clay for add sparkle (if you get any on your gem just lightly brush off with a paint brush).  If you're making a pendant pop in some eye pins or wire.  Now bake @ 275 for 25 mins, let cool then seal with any sealer you choose (I use a paint brush and some matte acrylic varnish). Hot glue to some post earring backs, add your chain and you're ready to shine!


Read more...

Paper Rosie Hair Pin Tutorial

>> Sunday, May 30, 2010


I just love the idea of whipping up a bunch of cute hair flowers for my friends for no reason at all, just because it makes them smile!  I created this super fun and easy tutorial for the lovely folks over at Crafty Ideas Weekly so you can surprise your friends, party guests or fellow soccer moms with a pretty handmade bloom to brighten their day too. I learned to make these fun little flowers from my mom when I was a little girl and now I'm sharing it with you. Think of all the lovely cardstock papers you could use to make these beauties fit any occasion!

Supplies -
 4x4 inch square cardstock
1.5x3 inch patterned green cardstock
bobby pin
glue gun
Matte acrylic spray sealer (I used Krylon,my favorite)


1- gather material
2 - draw a spiral on 4x4 carstock and draw 2 leaf shapes on green cardstock
3 - cut out along lines of spiral starting at the outside point and cut out leaves
4 - begin to tightly roll the spiral working from outside in
5 - keep spiral help tight
6 - let it go to see it uncoil ever so slightly to a natural rose (this always feels like magic for some reason)
7 - hot glue the little nub (it was the very center of your spiral) down to the rolled flower and hold in place for a few seconds
8 - slide bobby pin on to one leaf then place it on top ofthe second leaf and glue to the flower


Spray the entire paper flower and leaves with the sealer let dry 15 minutes and spray again.  This makes the bloom waterproof and allows you to wear it again and again. 

So sweet!

Read more...

Tutorial - Faux Broken China Necklace

>> Tuesday, May 25, 2010


I love to come up with out of the box recreations of things I love...my latest creation is a lighter funky alternative to broken china jewelry.  Made with shrink plastic, stamps, ink, markers and utee. This necklace looks fabulous and is fun to make!

Supplies- White shrinky dink paper (sanded), pretty floral stamp, permanent markers, utee (or clear embossing powder, 1/8 hole punch, chain and jumprings.

Let's begin!


step 1 - use a semi dark ink to ink your stamp


step 2 - press down onto sanded shrinky dink paper


step 3 - begin coloring the stamped image lightly with permanent markers


step 4 - cut out a section to resemble a broken piece of china.  remember to cut your piece approx 3 times larger than you'd like your pendant.  this one is 3.75 inches long


step 5 - using your 1/8 hole punch put two holes on either side of your shrink paper (for the jumprings)


step 6 - place in 350 * oven bake until it shrinks 2-4 minutes (or what ever directions your paper says to bake)


See how bright the colors become!


 ALERT!  Amazing techinique you can you for so many things
step 7 - sprinkle the entire pendant with a decent layer of utee or clear embossing powder


*notice how it's covered up to the ends to prevent dripping over in the oven.  place back in 350 degree oven and watch it.  you'll see it bubble up get clumpy weird then smooth out like glass...take it out when it's smooth. (be careful it's ridiculously hot until it cools and hardens...like 2 minutes)


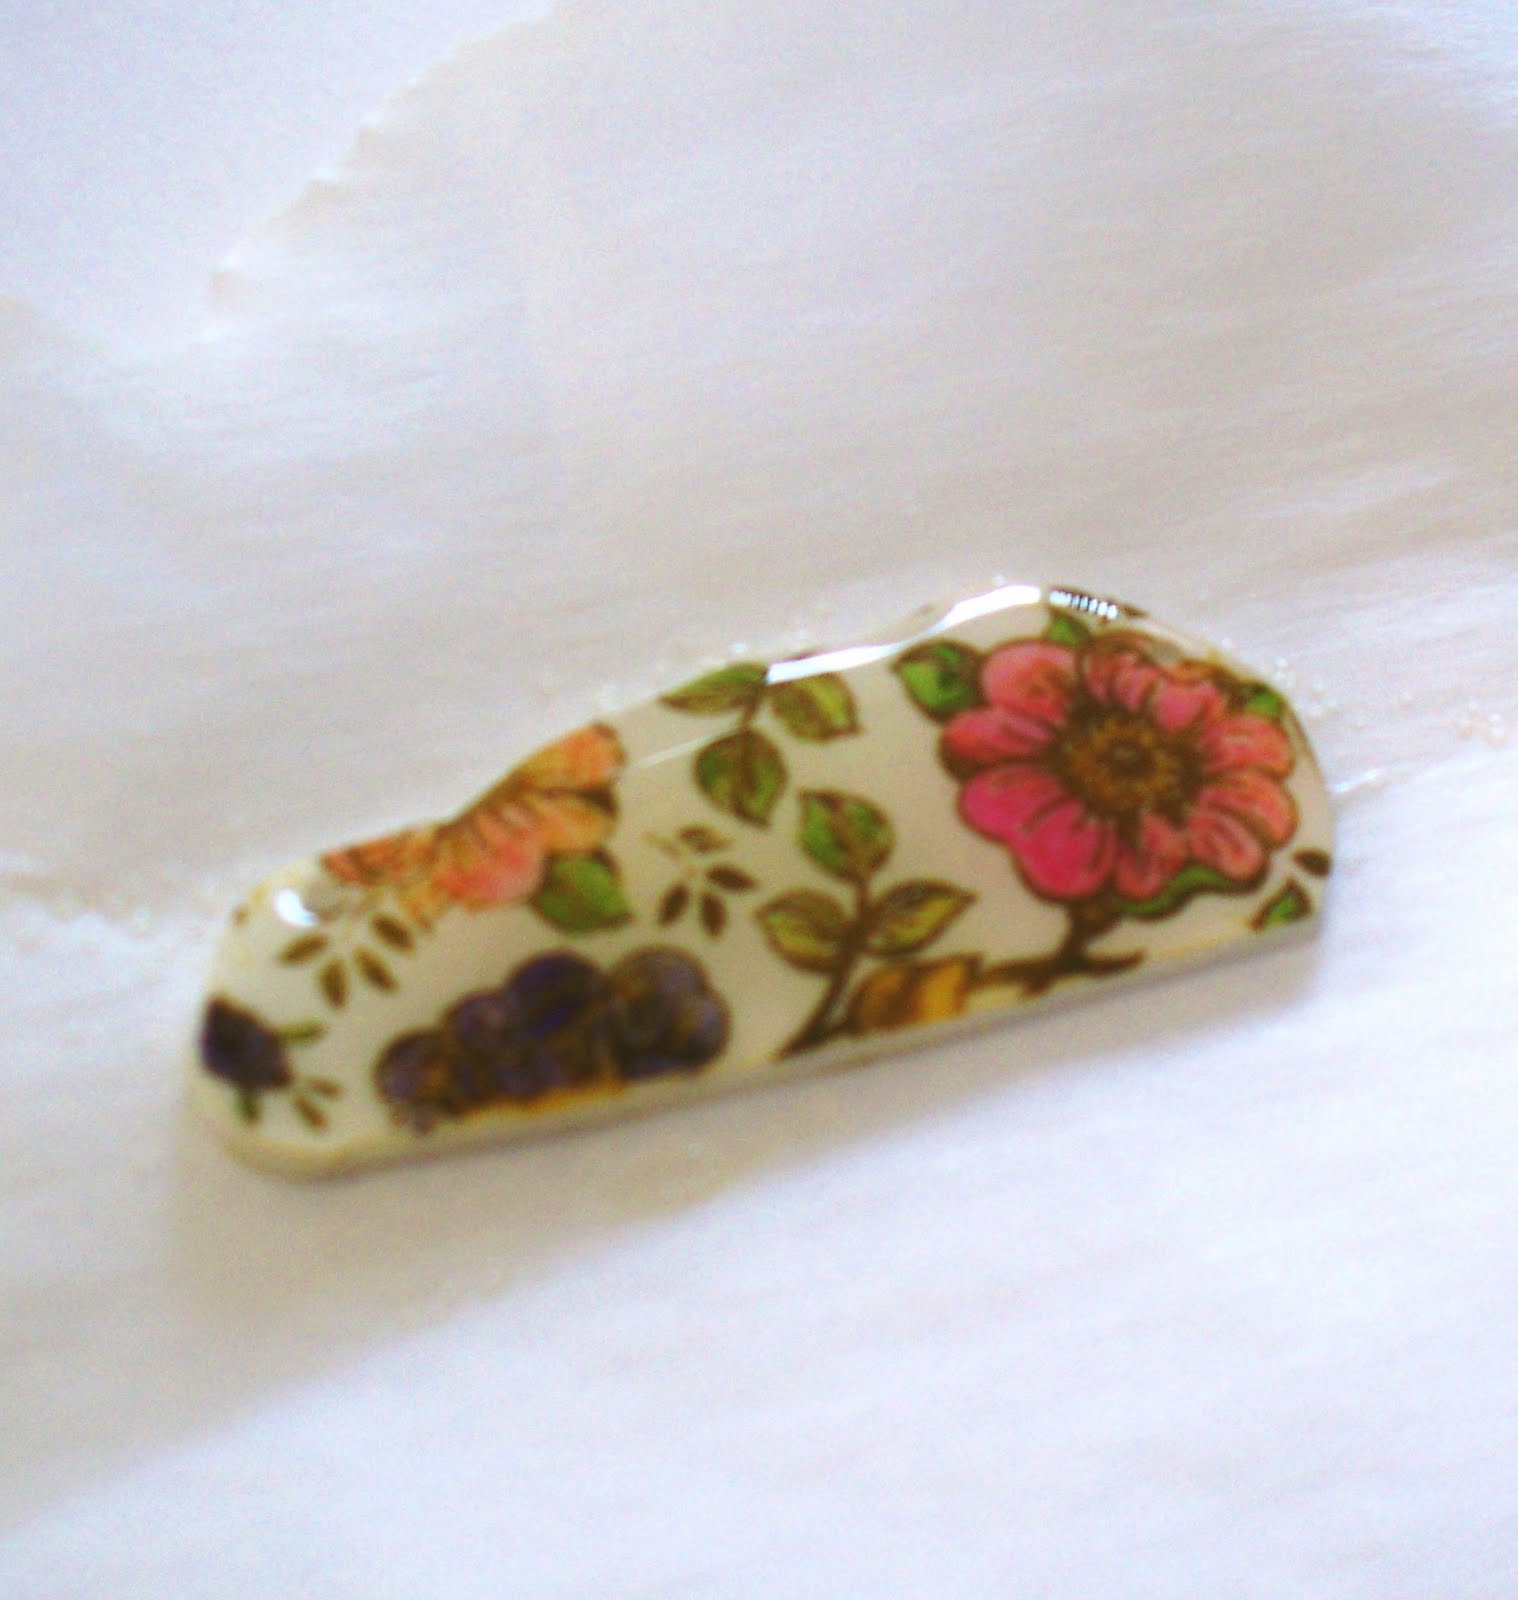
see...smooth and pretty


  Step 8  - Attach jumprings and chain of your choice and voila...fabulous faux china necklace!

Read more...